
 English
Views: 0 Author: Site Editor Publish Time: 2026-11-13 Origin: Site


Steel roofs offer incredible durability and striking visual appeal. They stand as a premier choice for modern industrial and commercial construction. However, metal is highly conductive and completely impermeable. This makes these structures notoriously prone to hidden moisture issues. Warm, moisture-laden air from inside your facility naturally rises. When it meets the freezing underside of the metal panels, sweating occurs almost instantly. Left unchecked, this hidden moisture saturates insulation and triggers rapid mold growth. Eventually, it leads to severe structural rot or rust. The ultimate defense against this building science nightmare is a properly installed protective layer. But exactly where does this layer go in a roof assembly? Placing it incorrectly traps moisture. This accelerates the exact damage you want to prevent. In this comprehensive guide, we break down the precise placement rules for both cold and warm designs. We will also explain the critical importance of sealing seams and give you actionable steps to protect your steel roof investment.
The Golden Rule: The protective membrane must always be installed on the warm side of the roof insulation. This stops indoor moisture from ever reaching the freezing exterior metal.
Warm Roof vs. Cold Roof: In a warm assembly, the barrier goes directly over the structural deck and under the rigid foam. In a traditional cold setup, it sits directly above the interior ceiling drywall, remaining below the attic insulation.
Moisture is the Enemy: Metal panels do not absorb water. Without proper defense, interior humidity will quickly turn into liquid droplets on the underside of the steel and drip back down into the building envelope.
Sealing is Non-Negotiable: A protective system is only as effective as its weakest point. Every seam and penetration must be meticulously sealed with acoustic sealant or butyl tape to prevent microscopic vapor bypass.
In the realm of building science, a vapour barrier is a highly specialized material. Manufacturers typically produce it from 6-mil virgin polyethylene plastic or foil-faced membranes. Its sole purpose is to keep indoor humidity from migrating into structural cavities.
Conversely, you must contrast this with a breathable roofing underlayment. Contractors install underlayments directly beneath the exterior metal panels. Their job is to block liquid bulk water, like wind-driven rain or melting snow. At the same time, they remain permeable enough to allow any trapped water vapor inside the assembly to escape outward. Confusing these two distinct materials is a recipe for a saturated, failing roof.
| Feature | Vapour Barrier | Roofing Underlayment |
|---|---|---|
| Primary Function | Blocks indoor humidity from entering insulation cavities. | Blocks exterior bulk water like rain and snow. |
| Permeability | Impermeable. It stops vapor diffusion completely. | Breathable. It allows trapped vapor to escape outward. |
| Exact Placement | Strictly on the warm side of the thermal insulation. | Directly under the exterior metal roofing panels. |
Everyday operations continuously generate indoor humidity. Industrial machinery, HVAC systems, and basic human respiration release gallons of water vapor daily. Because warm air is buoyant, it naturally rises toward the ceiling.
During colder months, exterior metal panels drop to freezing temperatures. When rising indoor air bypasses the insulation and collides with the freezing steel surface, it rapidly cools. The air hits its dew point. Consequently, it can no longer hold moisture as a gas. This results in severe condensation. As structural engineers, we frequently see this uncontrolled phase change lead to indoor rain. It ruins interior drywall, permanently compresses fiberglass insulation, and accelerates the galvanic corrosion of metal fasteners.
The foundational rule of moisture management is absolute. Vapor retarders must be installed on the winter-warm side of the building envelope. The primary objective here is interception. You must halt the migration of warm, moist air before it can enter the insulation cavity.
If the vapor is stopped on the warm side, it remains at a temperature well above its dew point. It stays in a harmless gaseous state. In contrast, if the membrane were incorrectly placed on the cold side near the exterior metal, disaster strikes. The warm air travels freely through the insulation, hits the cold plastic layer, and liquefies directly inside the insulation cavity.
While the warm side rule is universally applicable, the physical location of that warm side shifts depending on your regional climate zone. In cold, mixed, or temperate climates, the interior of the building is heated during the winter. Therefore, the barrier is placed on the inside of the assembly.
Exceptions exist only in extremely hot and humid tropical climates. In these heavily air-conditioned environments, the exterior outdoor air is consistently hotter and more humid than the interior. This means the vapor drive is reversed. For standard commercial applications outside of the deep tropics, however, interior placement remains the strict industry standard.
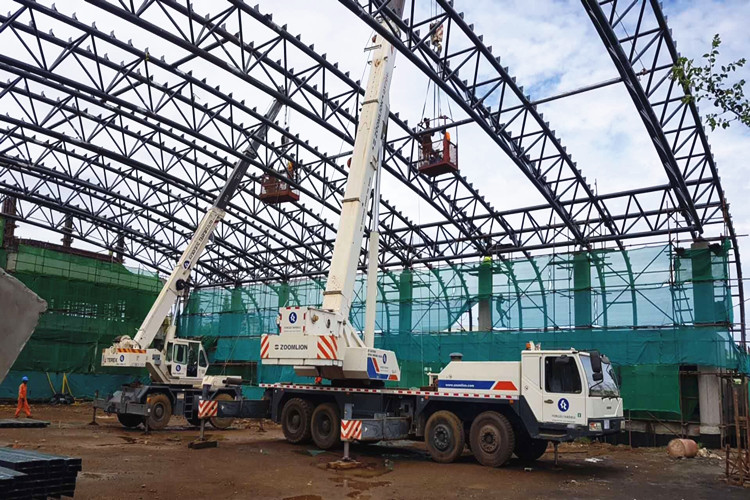
Modern commercial construction frequently utilizes the warm roof design strategy. For instance, when engineering large-span facilities like natatoriums or heavy industrial workshops, top-tier manufacturers utilize high-grade Q355B or Q235B steel pipe trusses. These robust frameworks support massive loads. By placing the primary thermal insulation entirely above this structural roof deck, the steel trusses remain at the exact same temperature as the building interior. This effectively eliminates thermal bridging through the steel members.
To ensure perfect moisture management in this setup, the materials must be stacked in a highly specific sequence. From the interior looking up, the cross-section is as follows:
Interior Ceiling and Structural Deck: This base provides structural support. It often consists of corrugated steel or heavy-duty pipe truss frameworks.
The Vapour Barrier: Rolled out directly on top of the structural deck.
Rigid Foam Insulation: Placed directly over the protective membrane. This provides the primary thermal resistance.
Breathable Roofing Underlayment: Applied over the insulation to protect against exterior bulk water.
Ventilation Space: Optional but highly recommended furring battens to create a capillary break.
Steel Roof Panels: The final exterior weatherproofing layer.
By placing the membrane directly on the structural deck, the rigid insulation above it is completely shielded from interior humidity. This preserves its R-value for decades.
Traditional residential and light commercial construction typically employs a cold roof design. In this conventional setup, the thermal insulation is laid flat on the floor of the attic, directly above the interior ceiling. The attic space itself is left uninsulated, heavily ventilated, and fully exposed to outside ambient temperatures.
Because the insulation is separated from the exterior roof deck by a large volume of ventilated air, the protective layer must be kept as close to the interior living space as possible. The correct bottom-to-top sequence is:
Interior Ceiling Drywall: The visible ceiling of the interior space.
The Vapour Barrier: Fastened securely to the bottom of the ceiling joists, just above the drywall.
Attic Insulation: Fiberglass batts or blown-in cellulose resting directly on top of the plastic membrane.
Ventilated Attic Air Space: An open area allowing outdoor air to circulate continuously.
Structural Roof Deck: Typically OSB or plywood.
Breathable Synthetic Underlayment: A secondary weather barrier beneath the metal.
Exterior Metal Panels: The outermost shield against rain and snow.
In this configuration, it is an absolute imperative that the plastic membrane never touches the exterior metal roof. Placing it directly under the cold exterior panels is a catastrophic error that guarantees massive water accumulation.
The foundation of a successful installation lies in choosing building-code-approved materials. A 6-mil virgin polyethylene sheet is the standard. It lacks the impurities found in recycled plastics that cause premature degradation. Before you even unroll the material, carefully inspect the substrate. Whether you are working on a flat steel deck or the bottom of wooden ceiling joists, the surface must be meticulously clean. It must be dry and entirely free of protruding screws or sharp metal burrs that could puncture the delicate membrane.
To minimize vulnerable seams, unroll the material in the longest continuous sheets possible. When fastening the plastic to framing, installers often make the mistake of using standard narrow-crown staples. These easily tear through the plastic under tension. Instead, use cap nails or cap staplers. These specialized fasteners feature a wide plastic washer that distributes pressure evenly. They hold the membrane securely without creating micro-tears.
A roof assembly is rarely a perfectly flat, uninterrupted plane. You will inevitably encounter plumbing vent stacks, electrical conduits, and structural supports. Every single penetration represents a massive liability for moisture bypass. When addressing pipes, cut the plastic in a tight star pattern. Push it snugly over the pipe, and seal it using specialized EPDM rubber gaskets or high-adhesion flashing tape. For electrical boxes, airtight polyethylene boots must be installed behind the hardware and permanently taped to the main sheet.
Moisture vapor behaves like a gas. It exerts pressure and actively seeks out the path of least resistance. Therefore, your protective membrane is essentially useless if air sneaks through the seams between the plastic sheets. Building science studies consistently demonstrate that even a tiny gap in a lap joint allows enough humidity into an insulated cavity to cause severe structural rot over a single winter season.
When joining two sheets of material, they must never simply be butted against one another. Industry standards dictate that every seam must overlap by a strict minimum of 6 inches. Furthermore, whenever possible, plan your layout so that this overlap occurs directly over a solid structural member, such as a joist or a deck truss. This provides a solid backing so that firm pressure can be applied when sealing the joint.
When you are balancing on a ladder or working across a massive commercial deck, it is tempting to just slap some standard duct tape on a seam. Do not make this mistake. Standard household adhesives dry out, become brittle, and fail rapidly when exposed to extreme temperature fluctuations.
To create a permanent, hermetic seal, you must use approved materials. Apply a continuous bead of acoustical sealant or a strip of double-sided butyl tape directly between the two overlapping sheets. Once pressed together, tape the top edge flat using a construction-grade, acrylic-adhesive sheathing tape. Finally, use a hard rubber roller to press the tape firmly into the plastic. This ensures absolute, bubble-free adhesion.
As building codes push for net-zero and highly energy-efficient structures, the construction sector is witnessing a massive shift toward tighter building envelopes. Industry analysis reveals a growing consensus among building scientists. Buildings are breathing less naturally today than they did twenty years ago. Consequently, the reliance on flawless moisture management systems has skyrocketed.
One prominent trend is the widespread adoption of smart vapor retarders. Unlike traditional 6-mil poly plastic that remains entirely impermeable, these advanced materials feature a variable perm rating. They block moisture during the winter when humidity tries to escape. However, they open their pores during the summer to allow any trapped structural moisture to dry inward.
Furthermore, commercial steel construction is moving almost exclusively toward warm roof assemblies. By keeping the structural steel entirely within the conditioned envelope, architects are eliminating thermal bridging. This drastically reduces the condensation risks that historically plagued metal buildings. Blower-door testing is also becoming a mandatory code requirement in many municipalities. This forces contractors to treat membrane installation not just as a formality, but as a highly engineered, airtight system.
One of the most destructive errors in modern construction is installing an impermeable layer on both sides of an insulation cavity. For instance, placing a poly sheet on the interior ceiling and then placing another non-breathable membrane on the exterior roof deck creates an inescapable moisture trap. Because no building envelope is absolutely perfect, trace amounts of humidity will inevitably find their way inside. If there is a barrier on both sides, this moisture cannot dry to the inside or the outside. This guarantees the rapid onset of mold and rust.
As previously highlighted, the material directly beneath the exterior metal panels must be breathable. A frequent error in cold roof retrofits is installing a non-breathable plastic sheet directly under the metal. When indoor moisture naturally rises through the attic, it hits this cold plastic layer and liquefies immediately. It then rains down onto the attic insulation, ruining the interior drywall below.
A protective membrane is a critical defensive layer, but it is not a standalone solution in a cold roof design. While it significantly reduces the volume of moisture entering the attic, it cannot stop all of it. Specifically, proper attic ventilation remains a strict requirement. A balanced system of soffit intake vents and ridge exhaust vents must be maintained. This continuously flushes out the attic space with fresh exterior air.
Installing a metal roof protects a building against the elements for decades. Yet, its true longevity depends heavily on how effectively you manage internal moisture. Knowing exactly where the protective membrane goes is the single most critical step in preventing devastating internal decay. The rule is simple. It always goes on the warm side of the insulation. Whether you are engineering a high-efficiency warm assembly or retrofitting a traditional vented attic, ensuring a continuous, airtight layer is vital. Take the time to measure carefully, overlap every seam generously, and seal every joint with the proper mastics and tapes.
Are you planning a new industrial facility or upgrading an existing commercial structure? Choosing the right structural framework and moisture management system is vital for long-term performance. Explore high-quality, custom-engineered steel solutions tailored to your specific climate and operational needs. Visit Sino Steel Structure to discover premium steel buildings, pipe truss structures, and expert engineering support that guarantees your investment remains safe, dry, and durable for a lifetime.
Yes, but its exact physical location depends entirely on your specific architectural design. The membrane is required on the warm side of your insulation. This means it belongs either above the ceiling drywall in a vented attic, or directly over the roof deck under rigid insulation in a warm assembly. It should never be placed directly against the cold underside of the exterior metal panels.
Without a protective barrier, warm and humid indoor air will rise and collide with the freezing underside of the metal roof panels. This causes immediate and severe condensation. The resulting water droplets will saturate your insulation, drastically lowering its R-value. Over time, this trapped moisture leads to rampant mold growth, rotting wood framing, and the rapid rusting of steel structural components.
A vapor retarder is designed specifically to stop indoor humidity from rising into your roof insulation and condensing. Conversely, a roofing underlayment is a breathable synthetic membrane installed directly beneath the steel panels. Its job is to prevent outdoor precipitation from entering while simultaneously allowing any trapped water vapor inside the assembly to escape outward.
No, standard Tyvek house wrap is not a vapor barrier. It is an air barrier and a breathable weather-resistive barrier. Because it is designed to let moisture vapor pass through it, it will not stop indoor humidity from reaching your cold metal roof. You must use a dedicated, impermeable vapor retarder like 6-mil polyethylene plastic on the warm side of the insulation.
Absolutely. While the exterior surface of a metal roof is heavily galvanized and painted to withstand severe weather, the underside is frequently less protected. Chronic moisture accumulation can lead to underside corrosion. It compromises the purlins or steel decking supporting the structure, and completely destroys the thermal resistance of your insulation.
Current building industry standards dictate that every seam should overlap by a strict minimum of 6 inches. To achieve maximum protection against vapor transmission, these overlapping joints must be completely sealed using acoustic sealant or specialized butyl tape, rather than relying on standard household adhesive tapes.
No. It is imperative to use a building-code-approved vapor retarder. This is typically a 6-mil virgin polyethylene plastic or a specialized foil-faced membrane. Standard, thin plastic sheeting degrades rapidly over time. It tears easily during the installation process and fails to meet the strict permeability ratings required to effectively stop moisture diffusion.
